Installing Playwright on macOS Monterey and the zsh bug: command not found

The idea for this article came out as a result of problems that a new macOS user experienced while trying to install the E2E test automation framework from Microsoft, Playwright. Seemingly a piece of cake, but… Actually, see for yourself.
Installing Playwright on macOS Monterey
So, you install the .NET SDK in the system and run the following command in the terminal:
dotnet tool install –global Microsoft.Playwright.CLI
You wait for the installation to complete and try running the playwright –version command. However, after confirming it, the operation is not correct, and from that moment the terminal starts displaying the title error informing that the command was not found:
zsh: command not found: playwright
At this point you may wonder if the installation actually took place and ask yourself “Why is this error appearing?”. That’s why my intention today is to briefly discuss what the title “zsh” is and the solution to the above error. I’ve collected the detailed instructions in one place to make it more efficient and allow you to enjoy Playwright’s work on macOS Monterey.
What is zsh and a system shell?
When the macOS Mojave’s successor, macOS Catalina, came to life in 2019 it included one of the most significant changes from the system’s user perspective. Namely, changing the system and interactive shells from bash to zsh (Z Shell). The alteration was a potential result of changes in the license bash was running on (version upgrade required a change from GPLv2 to GPLv3) available on macOS by 2019.
A system shell is nothing more than a computer program whose role is to act as an intermediary between the operating system / applications and user. It accepts instructions and presents the results of the programs’ operation. We can divide shells into text and graphic ones. The first are usually interpreters of commands run in text mode. The second are graphic shells in the form of well-known graphical file managers that can be controlled with the mouse and are the simplest form of performing operations on the device.
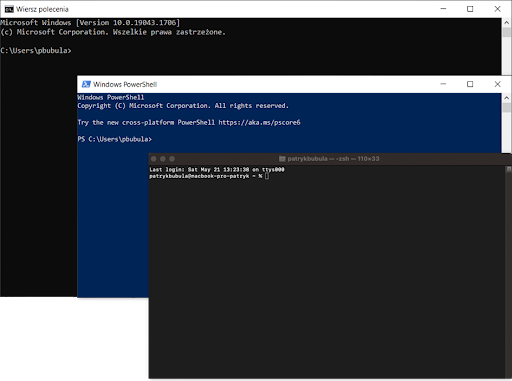
An example of a text shell for people working with Microsoft family systems will be cmd.exe (from Windows 2000) or PowerShell (from Windows XP). For macOS users, it will be the bash mentioned at the beginning (and recently just zsh) or Linux users. Graphical shells are the file explorer in Windows systems, or the Finder in macOS systems. Simply put, zsh (Z Shell) is a shell that allows you to work both interactively with the system and execute scripts in it.
Seeking the solution to our problem
Now that you know what a shell and zsh are, it’s time to go back to our problem. By searching network resources, you can see that the most recommended solution on many forums, or even stackoverflow, is to change the system shell to the one from which Apple has decided to withdraw from 2019, i.e. bash.
Apart from this solution, you can also find tips on trying to restart zsh in the terminal (unfortunately not affecting anything), or installing extensions of other shells, etc. From a new system user point of view, these are quite invasive solutions, except for resetting the terminal. In addition, an attempt to return to the old coating somewhat raises the question of whether this is the right direction, if the manufacturer himself decided to give it up in favor of a more modern and more “personalized” (via the Oh my ZSH community). By browsing subsequent pages and threads, you can find information about the path of the installed software and a file called .zshrc, which should be in the user’s files. Unfortunately, there is no information on how to check the software path through the terminal, nor why the .zshrc file is not in the path /users/<username>, but let us cover the topic step by step.
Step 1
The first reason to the lack of visibility of the .zshrc file may be the fact that it is a hidden file and available only after the following key combination: ⌘ + ⇧ +. (command + shift + period). Another cause might be that the file may not exist at all… But what is this file anyway? It allows you to store the paths to the installed software and the same environment variables called in the terminal. In order to be able to use them after restarting it, you need to set them permanently in the above-mentioned file.
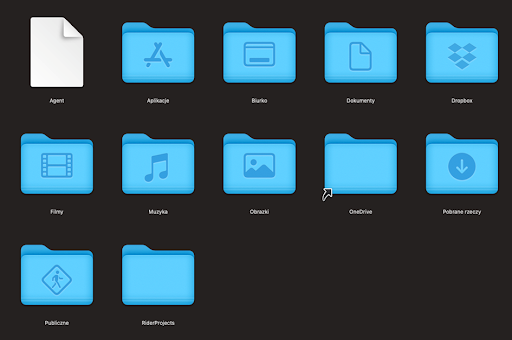
The first piece of the puzzle has been defined — the .zshrc file and storage of paths or variables. You should now set the path to where Playwright was installed. To do this, type in the terminal:
ECHO $PATH Microsoft.Playwright.CLI

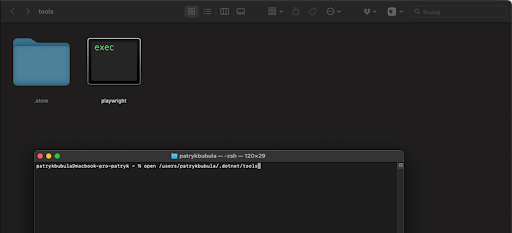
In the acquired results you can see a path referring to .dotnet/tools which can be accessed by typing in a terminal:
open /Users/<username>/.dotnet/tools
Success! You have located the place where Playwright was installed on your system.
Step 2
Okay, the path is fixed so all that’s left to do is add it to the .zshrc file. If this file is present in the system, all you need to do is edit it (for example in TextEdit), add the command to the content, and then save the file:
export PATH=/Users/<username>/.dotnet/tools:${PATH}
If the file is not present, go back to the terminal and follow these steps:
- Open a new terminal session
- Type zsh and confirm it with Enter
- Type: nano ~/.zshrc
- Enter the previous path:
- export PATH=/Users/<username>/.dotnet/tools:${PATH}
5. Press the keys:
- ⌘ + X (command + X)
- ⌘ + Y (command + Y)
- ENTER
6. Type ~/.zshrc to confirm the changes.
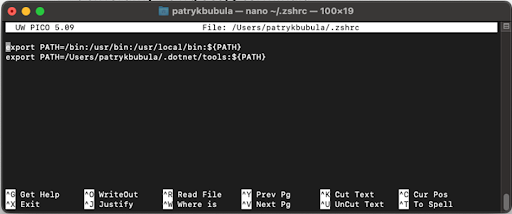
After typing the command: playwright –version again, you will notice that zsh no longer shows the title error, recognizes the command, but reports that no project using Playwright was found.

To finally confirm the solution to the problem, go to the used IDE (e.g. JetBrains Rider), open or create a new project as a “Unit Test Project” and install the necessary package through the NuGet package manager named: Microsoft.Playwright.NUnit.
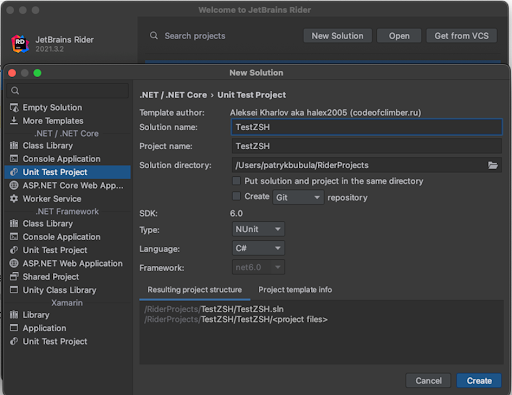
Then build the solution, run the terminal in the IDE. Go to the folder where the created project file (.csproj) is located, enter: playwright install and press ENTER:
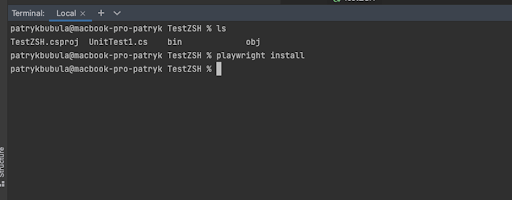
No zsh error, everything is fine. Now it’s time to enter the command: playwright open iteo.com.
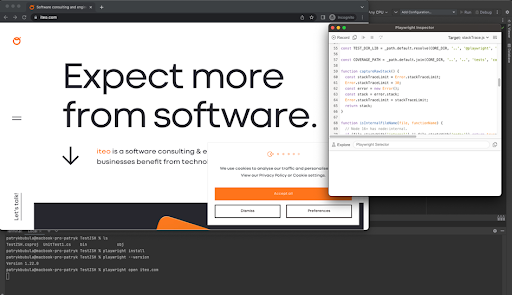
Success! This way, it was possible to confirm the solution to the problem with the wrong command and the correct installation of our framework.

